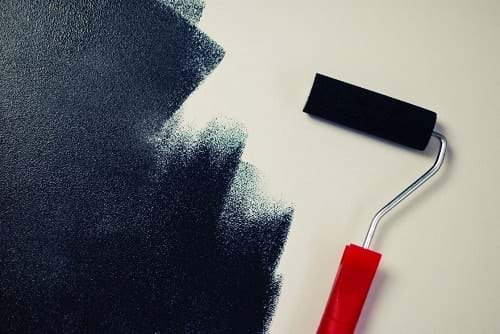
How to Repaint Your House
If you're repainting to sell & need a removalist in Melbourne, give us a call
July 2018
Are you considering repainting your house? The exterior of your home plays a major role in creating a lasting impression. The visual impact of a stunning paint job can do wonders for your homes street appeal, particularly if you are looking at selling your home, or if you’ve purchased a doer-upper house that needs a touch of TLC. And let’s not forget your homes interior; clean and smooth interior walls can really spruce up your home, whereas tired wallpaper, chipped walls, or a poor paint jobs can seriously lower the overall feel of your home.
Repainting your house can seriously improve the overall value of your home, increasing your profit come auction day, or making your home more pleasant to live in. So, if you’re looking for a straightforward way to maximise value, a house repaint is the way to go.
There are two options when it comes to painting your house; either hire the professionals or do it yourself. Hiring professional painters can be expensive, and doing it yourself can be time-consuming, so the best option for you depends on if you’re wanting to save time or if you’re wanting to save money.
If you do go for the DIY option, there are a few steps you should follow to ensure your work looks as professional as possible.
Here’s how to repaint your house like a professional:
1. Choose a Paint Colour
Choosing a colour palette will probably be the biggest decision when it comes to repainting your house and may even take more time than it takes to actually paint your home! Do take your time, while paint colours aren’t final, it can be costly and time consuming to change your mind half way through. Different areas can require different types of paint. Talk to a paint expert at a local paint shop to make sure you get the right paint. Exterior paints should be acrylic, wet rooms should be semi-gloss to repel moisture.
2. Prepare the Surface Area
Your paint job will only look as good as the surface beneath it. If it’s rough, uneven, or has dents and chips, it will all show through the paint job. You should also get rid of any rotted timber, mildew, and peeling paint. Fill in any dents and chips with putty, strip of any peeling paint, and sand back any roughness or other lumps and bumps. Only once you have a smooth surface should you even start thinking about painting.
3. Tape Up
Use masking tape to tape up any area that is not being painted. For example, if you are painting your walls, apply tape around your windows or ceilings to ensure clean lines and a smooth finish. There’s nothing worse than get new paint on areas that shouldn’t be painted or have already been painted! Masking tape can prevent this from happening.
4. Protect Your Home and Yourself
Lay drop sheets to protect your home, and wear clothes that you don’t mind getting paint on. Move any unnecessary furniture out of the room or cover your furniture with drop sheets as well. You should also consider wearing a dust mask if the paint fumes become a bit strong. To prevent sheets sliding and bunching, which can become a hazard, you might choose to lightly secure the sheets to the floor with masking tape.
5. Prime Your Area
Before you start painting you should prime your paint surface with a high-quality sealer to lock everything in place and create a smooth surface for your paint to cling to. You need to allow time for the sealer to dry before you can start on the painting, but there are some quick dry primers available that can dry in about 20 minutes.
6. Pick a Time to Paint
Repainting your house, particularly your exterior, needs to be carefully planned. Mother nature can wreak havoc on wet paint, so it pays to plan your exterior painting for a fine weekend. Interior repainting projects are more flexible, just as long as you have enough time to complete it to a high standard.
7. Start Painting!
Take your time when painting your walls, as rushed jobs are obvious. You’re likely to not need to paint for another 10 years or so, so it pays to paint carefully. Be sure to complete three coats of paint for the perfect finish, leaving adequate drying time between each coat. Once the main areas have been painted you can move onto windows, doors and trimmings, repeating the steps above.
8. Inspect Your Work
After your paint has had time to dry and you’ve moved all your furniture back in, or finished painting the exterior trimmings, step back and admire your work. Check your work in different lights, both natural and artificial, and at different times of the day to check for any imperfections.
9. Pat Yourself on the Back
Well done for completing a massive painting project! Many long hours went into prepping, priming and painting, and now your house looks a million bucks.
If you’ve repainted your house to add value before putting it on the market, then your home is now ready to sell. Your freshly painted house will be looking its best for potential buyers and you’ll be sure to capitalise on the value the new paint has added.
If you’ve sold your house and moving on to somewhere new, talk to John Ryan Removals, the leading house removalists in Melbourne. John Ryan Removals have been the trusted relocation company for over 40 years and offer a wide variety of services such as packing, storage, insurance and more. Talk to John Ryan Removals for all your house relocation needs.


